How to Varnish an Oil Painting: Why It Matters and How to Do It Right
There is a little bit of magic in varnishing a painting.
One minute, your oil painting may look uneven, dull, or patchy. Some areas are glowing, some areas are flat, and you are wondering if you did something wrong.
Then the varnish goes on.
The colors deepen. The darks come back to life. The surface evens out. The painting suddenly feels finished.
Varnishing is one of those final steps that can feel intimidating at first, but once you understand what it does and how to apply it, it becomes a beautiful part of the painting process. It protects your artwork, enhances your color, and gives your oil painting or acrylic painting a polished, professional finish.
Whether you are finishing your very first oil painting or preparing a piece for a collector, here is what you need to know about varnishing paintings the right way.
Quick Answer: What Does Varnish Do for an Oil Painting?
Varnish protects a finished oil painting from dust, dirt, moisture, UV exposure, and everyday environmental grime. It also evens out shiny and dull areas, restores color saturation, and creates a removable protective layer that makes future cleaning and conservation easier.
In simple terms: varnish helps your painting look better now and stay protected later.
Why Should You Varnish an Oil Painting?
Oil paintings naturally change as they dry. Some colors may sink in. Some brushstrokes may look glossy while others look matte. Dark areas can sometimes look dull or cloudy, even when the color underneath is rich and beautiful.
A good picture varnish helps solve several common problems.
Varnish can:
- Protect your painting from dust, dirt, moisture, and UV exposure
- Restore depth and richness to your colors
- Even out glossy and matte areas
- Create a consistent surface sheen
- Make your painting easier to clean in the future
- Add a finished, professional look before display or sale
Think of varnish as a clear, protective shield. It sits on top of your finished painting and helps preserve the artwork underneath.

What Is “Oiling Out” and Why Does My Painting Look Patchy?
If your oil painting has shiny spots in some areas and dull spots in others, you are not alone. This uneven look is very common.
Artists often call this problem sinking in or oiling out issues. It happens when different areas of the painting absorb oil differently. Some pigments naturally dry more matte. Some layers absorb more oil. Some areas may have more medium than others.
The result is a surface that feels visually uneven.
Varnish helps bring the whole painting back together. It restores that smooth, beautiful oil painting look and helps the surface feel unified.
When Should You Varnish an Oil Painting?
This is one of the most common questions artists ask:
How long should I wait before varnishing an oil painting?
Traditionally, artists were taught to wait six months or longer before applying a final varnish. That advice still applies to many traditional varnishes, especially damar varnish, because oil paint cures slowly over time.
However, modern varnishes like Gamvar Picture Varnish have changed the conversation.
Gamvar can generally be applied once the painting is tactilely dry, meaning the paint is dry to the touch and no longer feels tacky or wet.
What Does Tactilely Dry Mean?
A painting is tactilely dry when you can gently touch the surface without leaving a fingerprint, lifting paint, or feeling tackiness.
Drying time depends on how you painted.
Thin oil paint layers may be touch-dry in a few days.
Thicker paint or palette knife texture may take several weeks.
Paintings with lots of medium may take longer.
A good rule is this: do not varnish while the paint is still soft, sticky, or movable.
If you can disturb the paint with your brush while applying varnish, the painting is not ready.
Can You Varnish an Oil Painting After One Week?
Sometimes, yes.
If the painting has thin layers and is completely dry to the touch, a modern varnish such as Gamvar may be appropriate after about a week. But this depends on your painting, your paint thickness, your medium, humidity, and studio conditions.
Before varnishing, always check:
- Does the painting feel dry, not tacky?
- Can you gently touch it without leaving a mark?
- Are thick areas still soft underneath?
- Did you use slow-drying mediums or heavy paint?
When in doubt, wait a little longer. A painting can wait to be varnished. But varnishing too early can create problems.
Best Varnish for Oil Paintings: Matte, Satin, or Gloss?
Choosing the best varnish for your oil painting depends on the final look you want.
Gloss Varnish
Gloss varnish creates the richest color saturation. It deepens darks, brightens color, and gives the painting a luminous finish.
Choose gloss varnish if you want:
- Rich, deep color
- A traditional oil painting glow
- Strong contrast
- A vibrant, polished finish
Gloss is especially beautiful on bold, colorful paintings.
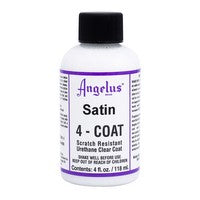
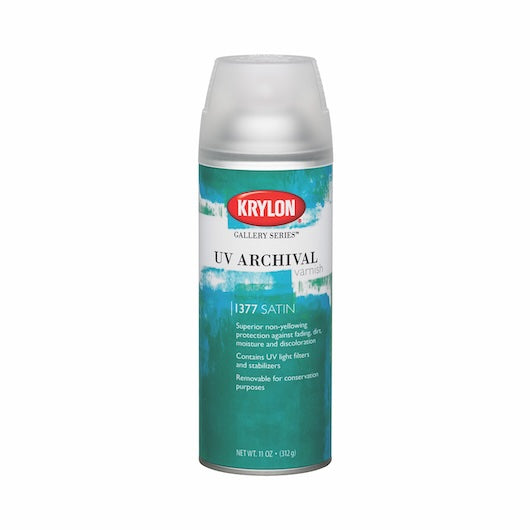
Satin Varnish
Satin varnish is a great middle-ground finish. It has a soft sheen without being too reflective.
Choose satin varnish if you want:
- A balanced finish
- Some color enhancement
- Less glare than gloss
- A versatile, all-purpose option
Satin is often a favorite for artists who want the painting to look finished without being too shiny.
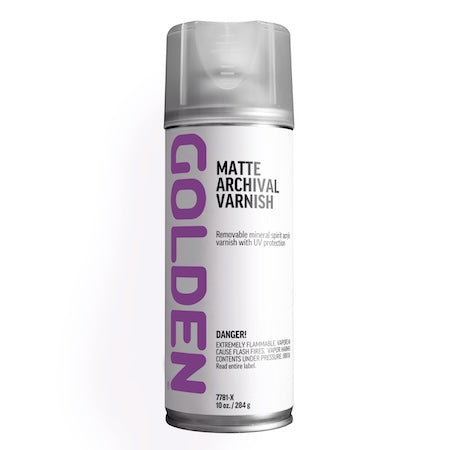
Matte Varnish
Matte varnish reduces shine and glare. It creates a softer, quieter finish.
Choose matte varnish if you want:
- Less reflection
- A subtle surface
- A softer look
- A finish that works well for muted or delicate paintings
One helpful studio tip: if you want to make a varnish more matte, some artists mix in a small amount of cold wax medium until they get the sheen they want. Always test first before applying anything new to an important painting.

Supplies You Need to Varnish an Oil Painting
You do not need a complicated setup to varnish a painting. You just need the right materials and a clean workspace.
For varnishing oil paintings or acrylic paintings, gather:
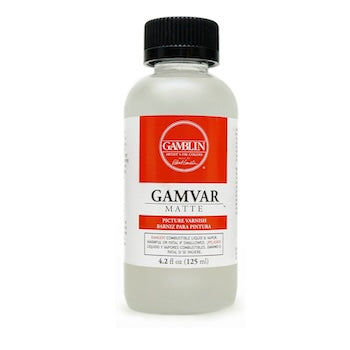
- Gamvar Picture Varnish in Gloss, Satin, or Matte
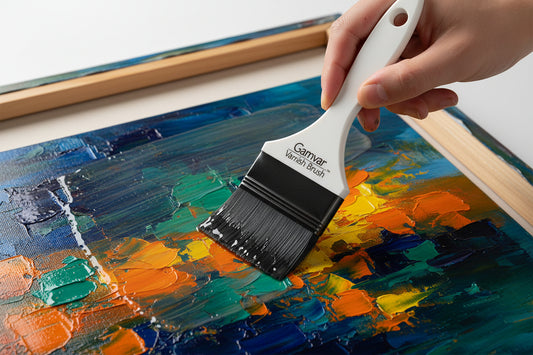
- A soft synthetic varnish brush - we like the Gamblin Gamvar Varnish Brush
- A small dish or container for varnish
- Paper towels
- A clean, dust-free workspace
- Good lighting so you can check for dull spots
At Huntsville Art Supplies, we stock products that artists actually use in the studio!
Why Use a Dedicated Varnish Brush?
A good varnish brush makes the process much easier.
A wide synthetic varnish brush helps you apply a thin, even coat without overworking the surface. The Gamblin Gamvar Varnish Brush is designed for varnish application, and the nylon bristles can handle the gentle scrubbing motion needed to work varnish into the canvas texture.
Another practical bonus: cleanup is simple with soap and water. Once the brush dries, the bristles may feel stiff, but you can gently “crack” them loose before the next use.
This is the kind of tool that can last a long time when cared for properly.

How to Varnish an Oil Painting Step by Step
Varnishing is simple, but the technique matters. The goal is a thin, even layer with no puddles.
Step 1: Make Sure the Painting Is Dry
Before you varnish, your oil painting must be tactilely dry.
Do a gentle touch test in an inconspicuous area. If the paint feels tacky, soft, or movable, wait.
Do not rush this step. Varnishing too early can trap solvents, disturb the paint, or create cloudy areas later.
Step 2: Clean the Surface
Dust and pet hair love fresh varnish.
Before you begin, check the painting carefully. Use a clean, soft brush or lint-free cloth to remove dust or debris.
Also check your workspace. A dusty room can ruin an otherwise beautiful varnish layer.
Step 3: Pour a Small Amount of Varnish
A little varnish goes a long way.
Pour a small amount into a dish so you can dip your brush without contaminating the whole bottle.
Do not pour varnish directly onto the painting unless you are very experienced. It is easy to accidentally use too much.
Step 4: Apply a Thin, Even Layer
Dip your varnish brush lightly and begin spreading the varnish across the painting.
Use gentle, even strokes. Work across the whole surface. Your goal is not to flood the painting. Your goal is to lightly coat it.
The biggest rule:
Do not leave puddles.
Puddles can create sticky areas, uneven drying, cloudiness, and long cure times.
Step 5: Gently Work the Varnish Into the Canvas
If your painting is on canvas, gently work the varnish into the weave. This helps cover textured areas and prevents dry spots.
You are not scrubbing aggressively. You are simply helping the varnish settle evenly across the surface.
This step is especially helpful for paintings with visible brushwork, canvas texture, or palette knife marks.
Step 6: Check for Dull Spots
After the varnish is applied, look at the painting under good lighting.
Tilt the painting slightly and check the surface. If you see dull spots, that area may not have enough varnish.
You can lightly touch up those areas while the varnish is still workable. Keep it thin and even.

Step 7: Let the Painting Dry in a Clean Area
Lay the painting flat or place it somewhere safe where dust will not settle on it.
Keep pets, fans, and floating studio debris away from the wet varnish.
Most varnishes become touch-dry within hours, but the exact drying time depends on the product, humidity, temperature, and how thickly it was applied.
Common Varnishing Mistakes to Avoid
Mistake 1: Applying Varnish Too Thick
More varnish does not mean more protection.
A thick coat can stay tacky, dry unevenly, or create cloudy areas. Thin layers are safer and more professional-looking.
Mistake 2: Varnishing Before the Paint Is Dry
If the oil paint underneath is still wet or tacky, the varnish brush can disturb the painting. You may smear paint, flatten texture, or permanently damage the surface.
Wait until the painting is tactilely dry.
Mistake 3: Using the Wrong Brush
A random old brush may leave bristles, streaks, or uneven coverage.
Use a wide, soft synthetic varnish brush that is meant for this job. A dedicated varnish brush gives you more control and a smoother finish.
Mistake 4: Working in a Dusty Space
Fresh varnish attracts dust quickly. Clean your table, check the painting, and avoid varnishing near fans, open windows, or high-traffic areas.
Mistake 5: Forgetting to Check the Painting in Good Light
Varnish can look even from one angle and patchy from another.
Always inspect the surface under angled light before you call it done.
Can You Varnish Acrylic Paintings Too?
Yes. Acrylic paintings can also be varnished.
Varnishing acrylic paintings helps protect the surface, unify sheen, and enhance color. Just make sure you are using a varnish appropriate for acrylics and follow the manufacturer’s instructions.
Acrylics dry faster than oils, but that does not mean you should varnish immediately. Let the painting dry thoroughly first, especially if there are thick areas of paint or gel medium.
Recommended Varnishing Supplies from Huntsville Art Supplies
For most artists, this is a great basic varnishing setup:
- Gamvar Picture Varnish — choose Gloss, Satin, or Matte
- Gamblin Gamvar Varnish Brush
- Paper towels
- Small dish for varnish
- Clean, dust-free table or studio space
- Good lighting
At Huntsville Art Supplies, we are always happy to help you choose the right varnish finish for your painting. Bring in your questions. Tell us what you are working on. We love helping artists finish their work confidently, not just start it.
Why Shop Local for Oil Painting Varnish?
When you shop at Huntsville Art Supplies, you are not just grabbing a bottle off a shelf.
You are getting help from artists who understand the materials. We can talk through your painting surface, drying timeline, finish preference, and whether gloss, satin, or matte makes the most sense for your piece.
You will also find artist-tested supplies, creative workshops, and a community of people who care about making art in Huntsville.
Whether you are varnishing your first painting or getting work ready for a show, we would love to help you choose the right finish.
Frequently Asked Questions About Varnishing Oil Paintings
Can I varnish an oil painting after one week?
Sometimes. If the painting is thinly painted and completely tactilely dry, a modern varnish like Gamvar may be suitable. If the paint feels soft, tacky, or thick areas are still curing, wait longer.
How do I know if my oil painting is dry enough to varnish?
Your painting should feel dry to the touch. You should be able to lightly touch the surface without leaving fingerprints, lifting paint, or feeling stickiness.
Why does my oil painting have shiny and dull spots?
This usually happens because different pigments, mediums, or layers absorb oil differently. Varnish can help even out the surface sheen and restore color depth.
Can varnish ruin an oil painting?
Varnish can cause problems if it is applied too thickly, too early, or in a dusty environment. Used correctly, varnish protects and enhances the painting.
Should I use brush-on varnish or spray varnish?
Both can work. Brush-on varnish gives you more control and is great for many oil paintings. Spray varnish can be useful for highly textured work or when you want to avoid brush contact. Always follow the product directions.
How long does varnish take to dry?
Many varnishes become touch-dry within hours, but full drying or curing can take longer depending on the product, humidity, temperature, and application thickness.
What is the best varnish finish for oil paintings?
Gloss varnish gives the richest color. Satin varnish gives a balanced finish. Matte varnish reduces glare. The best choice depends on your painting style and how you want the final piece to look.
Final Thoughts: Varnish Is the Finishing Touch Your Painting Deserves
Varnishing is one of the most satisfying final steps in oil painting.
It protects your work. It deepens your colors. It evens out the surface. And it gives your painting that finished, cared-for feeling that makes all the time you spent painting feel complete.
The key is to keep it simple:
- Let the painting dry.
- Use the right varnish.
- Apply a thin, even coat.
- Avoid puddles.
- Check for dull spots.
And when you are not sure which varnish to choose, come see us at Huntsville Art Supplies. We will help you find the right finish for your next painting.